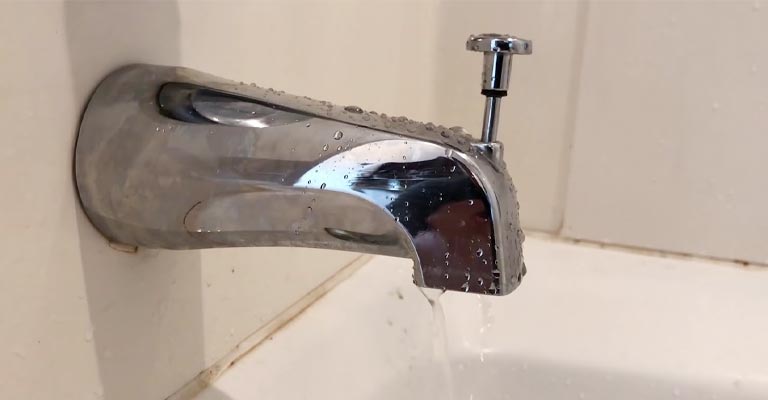
The shower diverter is a valve that switches the flow of water from the bathtub faucet to the showerhead. When the lever is lifted, the valve closes and water is directed to the showerhead.
There are several reasons why shower diverters can stop working, and when they do, water leaks, drips or only flows into the tub. It may be necessary to repair or replace the diverter when this occurs.
Diverters can stop working for a variety of reasons. It is usually a loose or stuck shower diverter that will not stay up.
There is no doubt that the spout is affected by heavy deposits if the diverter knob is stuck. The white plastic stopper inside has become loose or broken if the knob is loose and keeps going down.
Replacing the old diverter is the easiest way to resolve the problem. There is no doubt that this will cost you a healthy sum of money. Before replacing the diverter, you should consider repairing the old one. We’ll show you how in this article.
How Can I Fix A Shower Diverter That Won’t Stay Up?
There would be less water in the showerhead if the tub diverter would not stay up, and the faucet would leak water constantly.
Therefore, you should replace or repair the diverter spout. The first thing you must do is to determine why the shower diverter isn’t staying up. Let’s look at what could be causing this problem in your case.
Low Water Pressure

First, let’s take a closer look at the pull-up diverter’s mechanism. The rod cannot be locked in a specific position because there is no visible locking mechanism.
Why does a pin stay in a position without being pushed or pulled? This is due to water pressure. Yes, the water pressure holds a position for the washer and bracket and works according to the user’s commands.
This is why a low water pressure in your bathroom line causes the bracket to fail to stay up. Even if the water supply is low in your area, your “tub to shower” converter might fall down frequently.
Solution:
- Locate the main valve for the bathroom line. Check the main valve after reaching it to ensure it is fully open.
- Find the main water supply valve if the bathroom valve is on full mode but the pressure is still low.
- It is recommended that residential spaces have a water pressure of 40-60 PSI. You can adjust the mother valve by reading the pressure meter by connecting it to a water faucet.
- You can call a plumber if you are unable to adjust the pressure or locate the main valves. You won’t have to spend much on it.
Loose Diverter Pin

The shower diverter will keep popping out or turning on the faucet if the pin blocker or bracket is loosened.
Solution:
- The first step in troubleshooting is to thoroughly follow every step in the troubleshooting section and then carefully remove the spout.
- The pin and bracket are located on the housing of the spout. Make sure you have the pin, bracket, and washer out if you don’t see any visible problem. Make the pin fall off by spreading the bracket legs with a thin scissor.
- It is easy to remove the rest once the pin has been removed. Put those components on a clean cloth.
- Wider bracket legs are one of the first things that can cause your diverter to loosen. The bracket won’t stay tighter after consistent use for a long period of time.
- Alternatively, you can reinstall the bracket with the pin inserted and a plus wrench can be used to press the bracket legs. Only the bracket needs to be replaced if it doesn’t work.
- There is also the possibility that the rubber washer or blocker installed behind the bracket is worn out or broken.
- Over time, mineral deposits, excessive water pressure, and aging can all cause the rubber to wear out. In this case, you should replace the washer immediately.
- Reinstall the spout properly after fixing the bracket or washer issues. Test the diverter pin five or six times after turning on the shower valve.
- As long as everything looks okay, there is no need to worry, otherwise it is time to replace the diverter.
Diverter Pin Stuck

Mineral deposits and a lack of lubrication can cause the spout pin to become stuck. Every water outlet would be affected by mineral buildup if you live in an area with hard water.
Furthermore, an old spout’s rod or pin can get stuck if there is not enough grease or lube applied.
Solution:
- Turn off the main water supply first. After that, leave every outlet in the bathroom open so the bathroom lines can be emptied.
- The drainage holes can be blocked or covered with duct tape or waste clothes.
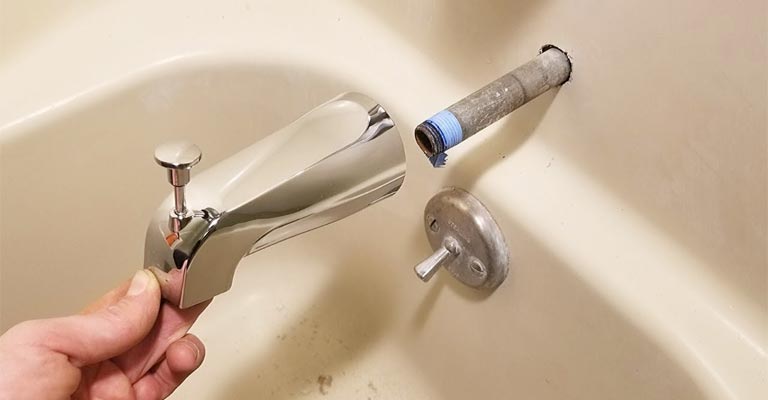
- Take a look below the spout and see if there’s a screw hole. Use an Allen key to remove it if you find one. Alternatively, you’ll have to twist the spout anticlockwise to remove it.
- Observe the spout properly after it has been removed. Verify that none of the components are damaged or worn out.
- Vinegar and warm water should be mixed in a 1:1 ratio in a bowl. For a while, pour water over the spout.
- The pin is held in place by a white plastic bracket within the diverter. Spread the bracket legs and remove the pin with a thin scissor or plus wrench. It is easy to remove the bracket once the pin has been removed.
- Using the vinegar solution, soak the components for 10-15 minutes if they are dismantled. After that, scrub the deposits off using a metal scrubber.
- Make sure you scrub the greenish layers off the areas until they are completely gone. When scrubbing the rubber ring with the bracket, be gentle.
- Let’s reassemble the spout. You may want to apply some plumber’s grease or WD40 over the bracket and inner housing. After that, put everything back in its proper place.
- You should check the spout again to see if it is leaking or if the diverter pin is stuck. You’re done if everything is okay.
Final Shower Diverter Repair Steps
Check all the parts for sediment buildup. You can clean them by soaking them in vinegar for an hour and then scrubbing them down with a wire brush.
Grease them after they are free of debris. Replace the stem washer if necessary if it shows signs of wear.
Ensure that all washers and O-rings are connected to the pipe. You should remove and replace any of these if you find any that can affect the diverter’s function.
Prior to installing, make sure they are the correct sizes and shapes and that they are coated with heat-proof faucet grease.
After disassembling the diverter valve, escutcheon, and valve handle, reassemble them working backwards.
Reconnect the water to the shower and try it again. After repairing the shower diverter, you can take it to a plumbing supply store if it did not resolve the issue.
The best way to find the correct replacement shower diverter valve is to have the old one with you.
How To Fix A Bad Shower Valve That’s Not A Tee Model?
Here’s another confusion I’d like to clear. You will see that most online tutorials and troubleshooting, including ours, talk about the
Tee model diverters that require pulling pins to operate, just like grenades. How about a diverter spout with a different type of shower system?
It doesn’t matter what diverter type you use; the solutions remain the same. After taking off your diverter and looking inside, you’ll find out why.
Diverter systems all work the same way. It would be better if you followed the sequence of troubleshooting we provided, cleaned up the debris, tightened if necessary, and dealt with the main valve pressure last.
Frequently Asked Questions
1. How Do I Know What Brand Shower Valve I Have?
The valve body is usually marked with the brand name or logo. Moen, Tuscany, and Kohler mark their brand names with the first letter of their names. The brand logo of some companies includes the full name of the company.
2. Are All Shower Diverters The Same?
The answer is obviously no. Diverters for showers come in many different types with different features. Recently, single diverters have become more popular.
3. How Do I Know If My Shower Diverter Valve Is Bad?
The main symptom of a faulty diverter valve is that no inlet can be completely closed. There would be constant drips from your faucet or showerhead.
The pressure and temperature of water would be unregulated as well if a bad shower valve was used.
4. How Much Does It Cost To Replace A Shower Diverter Valve?
Diverter valves for bathrooms usually start at $250. Within a price range of 300-400 dollars, you can easily find a stylish and durable diverter.
5. How Do You Tighten A Shower Diverter Valve?
Firstly, remove the nickel O ring and spout from the wall so that you can reveal the diverter valve. For the valve to be fully visible, you may need to break or cut off a small part of the wall. Then, turn the valve’s gate clockwise using a wrench.
Tips From The Pros
- Make sure nothing is overtightened. Components that are overtightened last less and leak more.
- The spout would need to be unscrewed from the wall with an Allen key 7/64 or nearly similar.
- Whenever you reinstall the diverter, make sure you put plumber tape over the threads of the valve.
Putting It All Together
There isn’t much to worry about when it comes to fixing a shower diverter that won’t stay up. Making the diverter spout work again takes 10-30 minutes, even for an amateur.
As an alternative, if the bad spout is not getting better, you should not waste your time and consider replacing it with a compatible one.
If your diverter is broken, you don’t need to call a plumber. A professional would also do what we described earlier. We are happy to explain the diverter mechanism in more detail if you need it.


